Created by the Kawaii Vibe editorial team. Our named style desks are editorial personas. Product details and availability can change.
If you want the short answer: start with one roll of washi tape, one sheet of stickers and a pen you like. Use the tape for straight lines (borders, tabs, labels, wrap bands) and the stickers for the small bits of personality. That covers about ninety percent of what you see in pretty journal spreads and neatly wrapped gifts.
This guide is written for people who have never touched washi tape, or who bought a roll once and stuck it on crookedly. We go through borders, wrapping and labeling with clear steps, plus how to plan a layout, what to buy and what mistakes to avoid. Nothing here needs special skill. A flat surface, a bit of patience and a pair of scissors will do.
Washi-style decoration is mostly about restraint. A few well-placed strips look sweeter than a page covered edge to edge. Read through, pick the section that matches your project today, and come back for the rest later.
Start Here: What You Actually Need
You need much less than the craft aisle suggests. For a first project, one roll of decorative tape, a small pair of scissors, a pen and something to practice on. That is genuinely enough. A ruler helps for straight borders, and a plain scrap of paper lets you test how a strip sits before it goes on your good page.
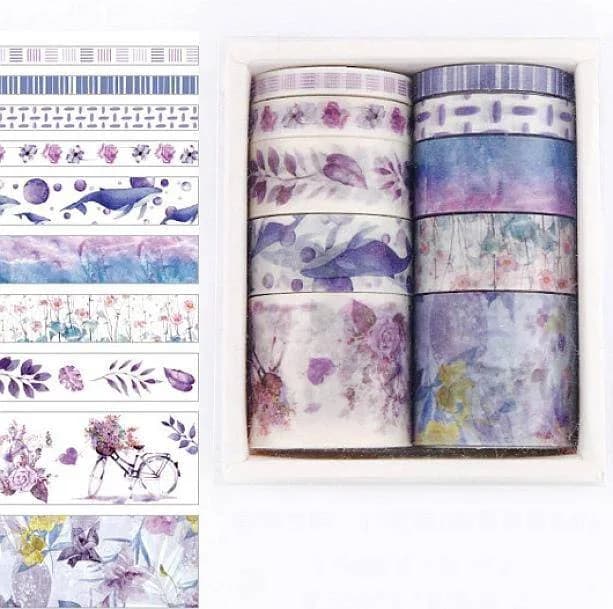
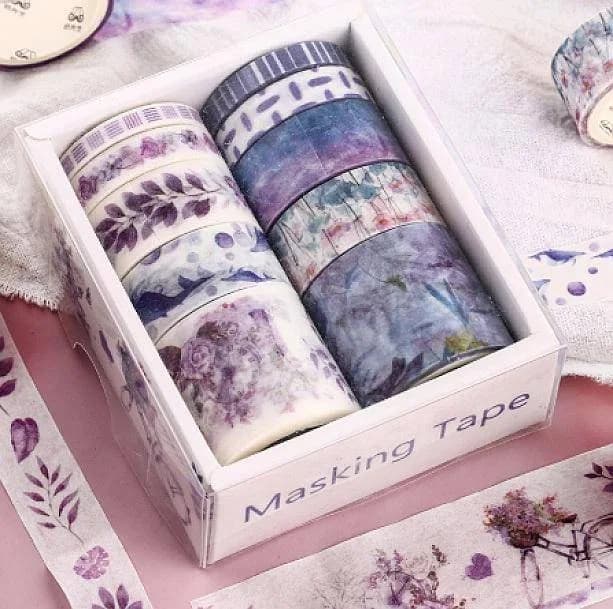
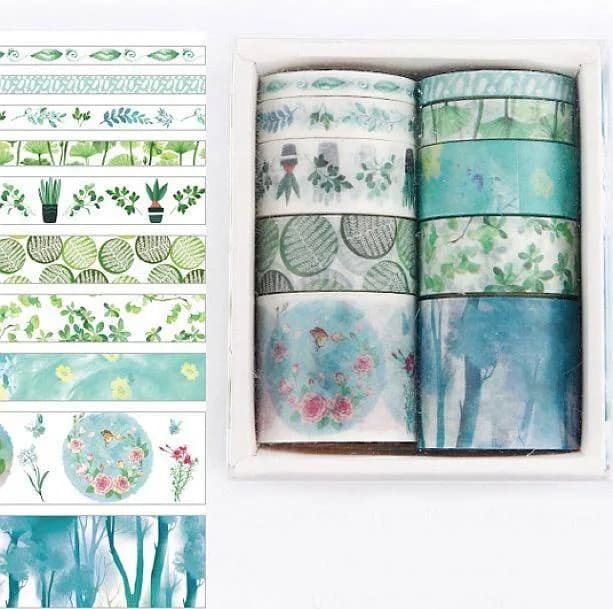
A good starter pick is the Aesthetic Washi Tape, which comes in purple, green, orange, blue and pink. Those are listed as the colour options, sold as one size. If you are unsure, choose the colour that matches the pen ink or sticker colours you already own, because matching one accent colour makes everything look planned.
Browse the wider stationery collection once you know what you like, but resist buying everything at once. Beginners often end up with ten rolls and no idea how to combine them. One roll teaches you how the material tears, sticks and lifts, and that knowledge carries over to every other roll you buy later.
- One roll of washi-style tape in a colour you will actually use
- Small scissors (tearing by hand works but looks rougher)
- A pen for labels and details
- Scrap paper for test strips
- Optional: a ruler for long straight lines
How Washi Tape Behaves
Washi-style tape is usually thinner and more see-through than regular sticky tape, and most people expect it to peel off paper more gently. That said, we do not make promises about any particular roll, so always test it somewhere hidden first. Stick a short strip on the back of a page or on scrap and lift it after a minute to see how it behaves.
Notice how it tears. Some rolls rip fairly cleanly by hand, others stretch or fray. If yours frays, cut with scissors for borders and save hand-tearing for casual strips. Notice too whether the colour looks different over a dark page or a patterned one. Light tape on dark paper can look washed out or patchy, while a bold tape on white paper looks crisp.
Finally, check how the sticky side reacts to your surface. Glossy paper, thin notebook pages and rough kraft wrap all grip differently. A strip that sits flat on a notebook may curl on a textured box. Knowing this before you commit saves your favourite journal from a messy peel-and-redo.
Planning a Layout Before You Stick
The easiest way to avoid a messy page is to dry-fit. Lay your tape strips, stickers and any photos on the page without pressing them down, and look from a short distance. Once it looks balanced, press one piece at a time. This takes two minutes and prevents almost every beginner regret.
A simple rule for balance: keep one busy corner and one calm area. If the top left has a stack of tape and stickers, leave the bottom right mostly empty, or give it just one small sticker. A page where everything is equally decorated feels crowded, and your writing has nowhere to breathe.
Think in threes. Three strips of tape, three stickers, or three colours is a comfortable limit for a single spread. Cut strips at slightly different lengths, since identical lengths can look stiff. Slight angles, around a small tilt, look relaxed, while perfectly parallel lines look tidy and formal. Pick the mood before you start.
- Dry-fit everything first, press second
- One busy zone, one calm zone
- Aim for about three tape strips and three stickers per spread
- Leave room for writing before decorating
Journal Borders, Step by Step
A border is the fastest way to make a page look finished. The simplest version is a single strip down one side or along the top. Press one end at the edge of the page, pull the tape gently straight without stretching it, and smooth it down toward the other end. Trim the overhang with scissors for a clean finish.
For a full frame, work in this order: top, bottom, then sides, so the side strips overlap the ends of the first two. Leave a small gap from the page edge if you want a floating-frame look, or let the tape run off the edge and trim for a bleed look. The floating frame is easier to keep straight because you can use the page edge as a guide.
If your line wanders, do not rip it off at once. Lift slowly from the start and reposition. If it has gone wrong, cover it with a sticker or a second strip instead of fighting the paper. A tiny heart or star sticker from the kawaii stickers collection can hide a corner mistake and look deliberate.
- Press one end first, then pull and smooth along
- Do top and bottom first, then sides
- Use the page edge as your guide for floating borders
- Hide slips with a small sticker
Tabs, Dividers and Page Markers
Tape makes useful page tabs, and this is where decoration becomes practical. Fold a strip over the edge of a page so half sits on the front and half on the back, with the sticky sides meeting. Trim the end into a notch or a straight edge. Write the section name on the tab with a fine pen.
Colour-coding keeps a journal easy to scan. You could use one colour for plans, another for notes and another for mood tracking. Keep it to three or four colours, otherwise you will forget the system. If you only own one roll, vary the tab position down the page edge instead, so each section sits at a different height.
For dividers, a single strip across the top of a page is enough to mark a new chapter. Add a sticker beside it as a visual cue. The sturdy feel comes from doubling the tab over, but check that the tape sits neatly over the page edge and does not catch when you flip pages. If it snags, trim it shorter.
Adding Stickers Without Overcrowding
Stickers add the personality that tape cannot. The trick is scale. Pick one larger sticker as the focal point, then add one or two small ones near it. Place them slightly overlapping a tape strip, since that overlap links the elements together and makes the page feel built, not scattered.
Match the mood of the sticker pack to the page. The Aesthetic Vibes Stickers suit mood trackers and soft diary pages, while the Vaporwave Retro Stickers fit a bolder, more retro spread. The Funny Art Stickers work well for lighter notes and to-do lists where you want a bit of humour. All three are listed as one size, shown as pictured.
A word on the Aesthetic Death Stickers: they lean darker and edgier, so they suit a moodier journal and may clash with a pastel theme. Choose stickers that fit the tone of the page, not just whatever looks cute in isolation. Mixing two themes on one spread usually looks messy.


Wrapping Gifts With Tape
Washi-style tape can replace ribbon on a simple gift. Wrap the present in plain paper first, since plain paper makes the tape the star. Then run one strip across the middle, or two strips crossing in the corner, which is quick and looks neat on boxes, books and flat items like notebooks.
Steps: wrap and secure the paper with regular clear tape on the inside seam. Choose where the decorative strip goes, usually across the centre or a third from one edge. Press one end on the back of the gift, pull gently across the front, and press the other end on the back. Fold the ends under so no raw cut shows on the front.
Check how well the tape grips your wrapping paper before relying on it. Glossy or textured paper may not hold a light strip, so keep the plain tape on the seam for strength and treat the decorative strip as trim only. For heavier items, do not trust decorative tape to hold anything together.
- Plain paper makes tape stand out
- Secure seams with ordinary tape first
- Fold the ends under the gift for a clean front
- Treat decorative tape as trim, not the main hold
Labels, Tags and Name Strips
A tape label is simple. Stick a strip onto the item, then write on top with a pen. Alternatively, write on a strip stuck onto baking paper or a scrap first, then peel it off and place it, which lets you fix spelling mistakes before it lands on the gift. Use a pen that dries quickly on slick surfaces.
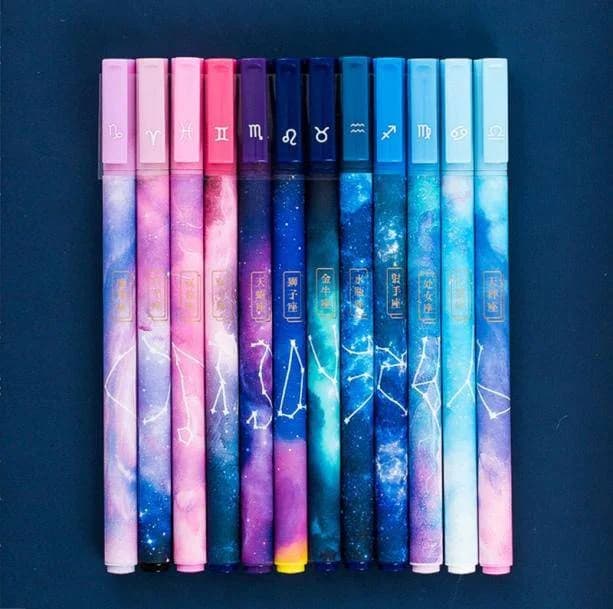
Test your pen on the tape. Some inks smudge on the smooth surface, and the label then looks messy. Try gel and fine-liner types on a test strip, and let the ink dry before touching it. The Cosmic Galaxy Pens are a fun option for decorative lettering, though do your own test on the tape since results vary by surface.
For gift tags, fold a strip over the top of a small card or piece of paper so it forms a sturdy hanging edge, then punch or tape it to the package. Short words look best: a name, a single word or a small date. Large paragraphs on tape get cramped and hard to read, so keep it brief.
Labeling Around the Home and Desk
Tape labels are handy beyond gifts. Mark a folder, a cable, a pencil case or a storage box with a short name. A strip across the front of a notebook spine helps you find the right one on a shelf. These small jobs are where washi-style tape earns its place as a practical tool.
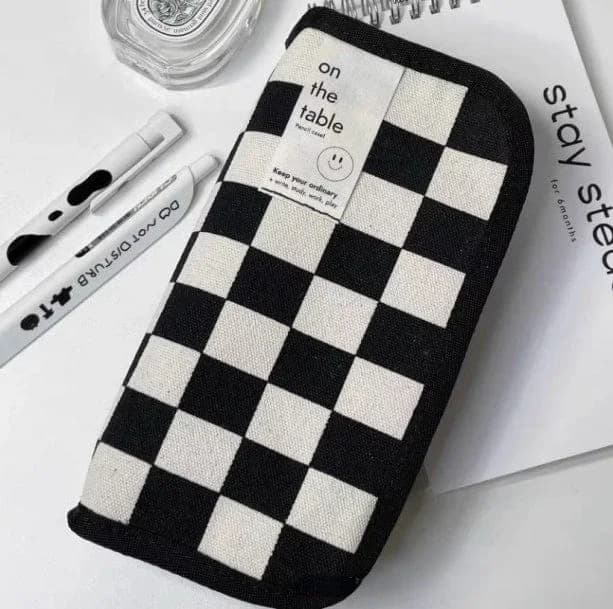
If you keep pens and supplies together, the Checkered Pencil Case can hold your tape roll, scissors and pens, and a tiny label strip inside tells you what is stored where. Keeping a tidy kit means you actually use the supplies instead of losing them in a drawer.
Be careful on surfaces that mark easily, such as painted walls, varnished wood or electronics. Test in a hidden spot, and avoid sticking tape to anything delicate or valuable. When in doubt, put the label on a removable card instead. We cannot promise how any tape will lift from a specific surface, so cautious testing is the sensible habit.
Mixing Colours and Patterns
Colour confidence comes from a simple formula: one main colour, one supporting colour and one neutral. For example, pink as the main, blue as the support and white or kraft paper as the neutral. The five colours of the Aesthetic Washi Tape make it easy to pair two rolls this way.
When mixing patterns, change the scale. A wide, plain strip next to a thin, busy one looks balanced, while two busy rolls of similar size fight each other. If you are unsure, use a solid colour roll beside any patterned element and let the pattern take the spotlight.
Think about the pen and sticker colours too. Pull one shade from your stickers and echo it in the tape. That quiet link makes the whole page feel curated even if you bought each item at a different time. If a combination feels off, remove the loudest piece first and look again.
Cutting, Layering and Clean Finishes
Clean ends make a big difference. Cut tape ends at an angle, or in a small V shape, for a neat flag look. Straight cuts are tidy and classic. Choose one style per page and stick with it so the spread feels consistent.
LayeringWearing pieces over or under one another to add depth, warmth or contrast. adds depth. Place a wide strip first, then a narrower strip on top of it, slightly off-centre. You can also stack small pieces into a patch, like a frame for a photo corner or a sticker. Press each layer flat as you go so air bubbles do not appear, and smooth bubbles outward with a fingertip.
Avoid stretching the tape while placing it. Stretched tape tends to shrink back or wrinkle, leaving wavy edges. Let it fall onto the page, then press. If you need a curve, make it from short overlapping pieces instead of bending one long strip, which usually creases.
- Angle or V-cut ends for a flag look
- Layer wide under narrow
- Do not stretch the tape
- Build curves from short pieces
Common Beginner Mistakes
The biggest mistake is overdoing it. Beginners often cover every inch, then cannot read their own writing. Remove one element from any spread that feels busy. A second mistake is sticking down tape before checking it on the actual paper, which can cause lifting, tearing or ghosting on thin pages.
Another common slip is using decorative tape for jobs that need strength. It is a trim, not a replacement for proper adhesive on heavy items. Likewise, do not assume it is safe for photos, documents or sentimental paper unless you have tested it on a copy first. Keep originals away from experiments.
Finally, avoid buying by colour alone. A roll that looks lovely online may be wider or narrower than you expected, so check the listed details before buying and do not assume sizes we have not stated. Starting with one roll, plus small extras from the Little Accessories collection, keeps experiments low-risk.
Three Quick Project Plans
Project one, the weekly spread: a single tape strip along the left edge, a small sticker at the top corner, and a heading in pen. Total time is about five minutes. Use a colour that matches your main pen so everything looks related. Repeat each week with a different colour for easy flipping.
Project two, the wrapped notebook gift: plain paper, one strip across the centre, a tape tag with a name, and one sticker on the corner. Pair it with a pen such as the Novelty Syringe Pens if the recipient likes quirky stationery, though check the style suits them first, since the design is unusual and not everyone enjoys it.
Project three, the desk reset: label two folders, wrap a tab around a notebook page and tidy loose supplies into a case. This one is about using tape practically. Browse the aesthetic stationery collection if you want matching notebooks or planners to go with the look, and choose items by the details listed on each page.
- Weekly spread: one side strip, one sticker, one heading
- Gift: plain paper, one band, one tape tag
- Desk reset: labels, tabs, one tidy case

Buying Checklist and Next Steps
Before you buy, decide what you are making. If it is journaling, you want tape and stickers. If it is gifts, you want tape, plain paper and a pen. If it is organizing, add a case and labels. Writing this down keeps you from wandering into extra purchases you will not use.
Compare options by the facts on the page: listed colours, sizes and what is shown in the photos. Where a page says one size or as pictured, that is all we can promise, so do not assume extra features. Choose one roll, one sticker pack and one pen, and see how you use them for a couple of weeks before expanding.
When you are ready for more, revisit the stationery collection or the kawaii stickers and add one thing at a time. Small, steady additions build a kit you really use, which beats a drawer of unopened packs every time.
- Know the project first: journal, gift or organizing
- Start with one roll, one sticker pack, one pen
- Test tape on scrap or a hidden spot
- Check listed colours and sizes, not assumptions
- Add one new item at a time