Created by the Kawaii Vibe editorial team. Our named style desks are editorial personas. Product details and availability can change.
The quick answer: pick the layout that matches how many things you write down on a normal day, not how many you hope to write on a perfect day. If you have three to five items, a weekly spread is usually the sweet spot. If your day is packed hour by hour, go daily. If you mostly track deadlines and shifts, monthly does the job.
A cute planner only works if you open it. Pretty covers and sticker-ready pages are great, but the size, paper and layout decide whether it lives in your bag or ends up in a drawer by week three.
This guide walks through the choices in order: how to audit your week, how each layout behaves, what paper and size mean in practice, and how to decorate without wrecking your space. Examples for students and part-time workers are in there too. Nothing here assumes a season or a school calendar, so it works wherever you are.
Start With a Five-Minute Schedule Audit
Before comparing covers, look at your last normal week. Open your phone calendar, your messages and any screenshots of rosters or timetables. Count how many separate things you needed to remember each day: classes, shifts, bills, errands, social plans, small tasks. Write the average, not the busiest day.
Then note where the information comes from. If your shifts arrive by text on Sunday night, you need a layout that lets you fill a whole week at once. If your lecturers drop deadlines at random, you need somewhere to add things mid-week without squeezing. If your life is mostly repeating blocks, you barely need a big planner at all.
Finally, ask when you will actually write. Morning on the bus, at a desk at night, or in quick snatches between tasks? Bus writing needs a small, sturdy planner that stays flat on your knee. Desk writing can handle a larger format and stickers. Your answers here make every later decision quicker.
- Average number of items per day
- Where your schedule information arrives
- When and where you will write
- Whether you want to plan, track, or just remember

Weekly Layouts: The Safe Middle Ground
A weekly layout shows seven days across one spread, and it suits most people with a mixed routine. You can see your whole week at a glance, spot a crowded Thursday, and move a task to a quieter day without rewriting anything. That overview is the main reason weekly planners are the usual first buy.
There are two common styles. Vertical layouts give each day a tall column, which suits short lists. Horizontal layouts give each day a wide row, which suits people who write full sentences. Some have a time-grid, which is helpful if appointments matter more than tasks. Some are open boxes with no times, which is easier for loose plans.
Check the space per day before buying. If each box fits only two or three short lines, it will frustrate you if you regularly have six things on. Also look for a notes or habits strip, since a small side area catches the stuff that does not belong to one day. Weekly layouts are the best default when you are unsure.
Daily Layouts: Only If Your Days Are Dense
A daily layout gives each date its own page. It is lovely if you plan by the hour, juggle several classes and a job, or like to journal a little alongside your tasks. The room to breathe makes it feel calming rather than cramped.
The catch is bulk and commitment. A year of daily pages is thick, and empty pages can feel like a guilt trip when you skip a few days. If you know you only write on busy days, daily may not suit you. Look for undated pages, which let you skip without leaving blank dates behind.
A good test: if you regularly run out of room in a weekly box, try daily. If you rarely do, you are paying for space you will not use. Some people use a daily layout only during a heavy stretch, like exam time or a busy work period, and switch back to weekly afterwards. That is a perfectly sensible way to use one.

Monthly Layouts: Great for Deadlines, Weak for Details
A monthly spread shows a whole month in a grid. It excels at big-picture jobs: assignment due dates, pay days, birthdays, trips, rosters that repeat. If you mainly need to see what is coming, monthly is quick and uncluttered.
Its weakness is space. Each square is small, so you can fit a few words or a sticker, not a to-do list. That is fine for part-time workers who mostly record shift times, but tough for anyone with many small tasks. Think of it as a map, not a diary.
Many planners include both a monthly spread and weekly pages, which is often the best value. Use the month to place the big markers, then the week for the daily detail. If you are choosing a monthly-only notebook, check whether the grid starts on Monday or Sunday, since that affects how natural it feels. Also check if the squares are equal in size, because uneven ones waste room.
Example: A Student With Classes, Deadlines and a Social Life
Picture a student with four classes, a few assignments at once and weekend plans. A weekly vertical layout with a monthly overview is a strong match. The month holds big deadlines and exam dates. The week holds class times, reading, and smaller tasks.
A simple routine helps. On Sunday, copy deadlines from the month into the week, then add fixed classes. Mark each assignment two or three days before the real due date as a starting point, so you are not surprised. Use a colour or sticker only for deadlines so they stand out from everyday notes.
If you are heading back to class, browsing the Aesthetic Back To School Stationery collection can help you pick pens and add-ons that match your planner in one go. Keep it practical: one planner, one pen you like, and a small pouch. Anything beyond that is optional and can wait until you know your routine.

Example: A Part-Time Worker With Shifting Hours
Shifts that change weekly are the toughest case, because you cannot pre-fill anything. A weekly horizontal layout with a time-grid works well, since you can block out the exact hours and see free time around them. Pencil in shifts first, then fit in everything else.
A monthly view is a useful backup if your employer posts schedules a few weeks ahead. Mark shifts there in one colour, and record pay days in another. If you work across two jobs or a job plus study, use two colours so a glance tells you where you need to be.
Keep a small notes area for things like swap requests or availability deadlines. Those slips of information are easy to lose in messages. A planner that is slim enough to carry daily beats a gorgeous one you leave at home. If you often write at work breaks, check that the cover is firm enough to write on while standing.
Paper: What to Check Before You Commit
Paper decides how pleasant your planner is to write in. The main issue is show-through: do pen lines appear on the other side? Thin paper is light and good for gel or ballpoint pens, but it can ghost with felt tips or highlighters. Thicker paper handles more but adds weight.
Since product listings do not always state paper weight, avoid assuming. Look for the seller's description, and if the details are missing, plan around your lightest-touch pens. A quick test at home with your usual pen on the back of a page tells you a lot once it arrives.
Also consider finish. Smooth paper makes pens glide but can smudge slowly drying inks. Slightly textured paper grips pencil better. If you love stickers, paper that is not overly glossy tends to hold them better and lets you peel and reposition. Think about whether you write in pencil to adjust plans, since changing schedules suit erasable writing.

Size: Matching the Planner to Your Bag and Desk
Size is a trade-off between writing room and portability. A larger planner gives bigger boxes and room for stickers, but it needs a desk and a bag with space. A smaller one slips into a pocket or tote but forces tiny handwriting.
Measure your bag, not your wishes. Put a notebook of similar size in it for a day and see if you notice it. If it irritates you, you will leave the planner behind. Also think about where you write. A big planner on a tiny cafe table or bus seat is awkward.
Check the listed dimensions in any product you consider, and compare them to something you own, like your phone or a textbook. If dimensions are not given, ask before buying instead of guessing. A common sensible compromise is a mid-sized planner for desk use plus a few sticky notes or a small notebook for on-the-go jotting that you transfer later.
- Place a similar-sized notebook in your bag for a day
- Check box size against your handwriting
- Match size to your main writing spot
- Compare listed dimensions to an item you own
Dated, Undated and Binding Choices
Dated planners come with the days printed, which saves effort and shows holidays or moon phases only if the maker includes them. Undated planners let you write your own dates, so you can start any time and skip quiet weeks. If your motivation comes in bursts, undated is forgiving.
Binding changes how the planner behaves. Spiral and coil bindings lie flat and fold back, which is handy for writing on the go. Stitched or glued bindings feel more like a book but can resist lying flat. Disc or ring systems let you swap pages, though they add bulk.
Left-handed writers often prefer spirals that fold fully back, but a spiral edge can dig into the wrist for some. Check how the cover feels, too: a soft cover bends in a bag, while a firm one gives a writing surface. Decide whether you want to keep the planner after the year ends. If so, a sturdier bind is worth it.

Decorating Without Losing Function
Decoration is half the fun of a cute planner, but it works best when it serves the page. Use stickers as signposts: one design for deadlines, another for social plans, another for self-care or chores. That way the cute stuff doubles as a colour code.
Browse the Kawaii Stickers collection for sets, then decide a job for each. For example, Aesthetic Vibes Stickers could mark weekend plans, while Vaporwave Retro Stickers might flag deadlines for a retro-leaning spread. Funny Art Stickers suit light-hearted reminders like laundry or bills. If your taste runs darker, Aesthetic Death Stickers can add contrast on a pastel page.
Leave at least half of each day box clear. A page crammed with stickers hides the writing you need. Place stickers in corners or header strips, and add them after you write the plan, so you know how much room is left.

Pens, Pouches and Small Add-Ons
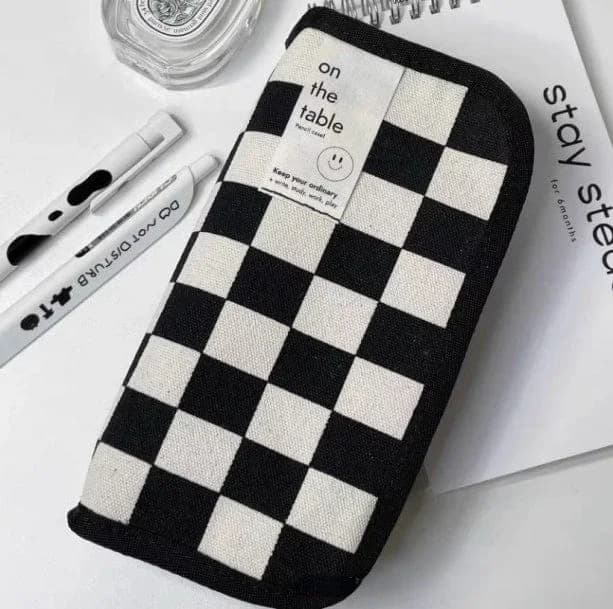
A planner is only as handy as what you carry with it. A small set of pens, a pencil, and a few stickers is plenty. Too many tools slows you down and weighs a bag.
For storage, the Cute Toothpaste Pencil Case is listed as vegan leather and measures 29 x 10 cm, so it could hold a few pens and a slim highlighter next to your planner. Check that length against your bag before ordering. For writing, the Novelty Syringe Pens are a playful option for people who like a quirky desk, though you may prefer a plain pen for tiny handwriting.
If you want more to browse, the main Stationery collection and the aesthetic stationery page cover related picks. Choose one pen type for planning, so your pages look consistent, and keep fancier ones for headings. Add-ons are optional, and a planner works fine with just one reliable pen.


Common Pitfalls and How to Avoid Them
The biggest mistake is buying for an imaginary routine. A tiny planner for a person with a packed week, or a daily planner for someone who plans in two lines, ends up ignored. Use your audit to be honest.
Another trap is over-decorating on day one. Many people spend an evening on a gorgeous spread, then feel they cannot write messy plans in it. Keep a rough area, like a notes page, where mess is allowed. Pencil first, ink and stickers after plans settle.
Also watch for starting too early in a layout that does not fit. Give a new planner two weeks. If you keep running out of room, or leaving pages blank, that tells you which layout to try next. Avoid buying a full year of daily pages as your experiment. Start with an undated or shorter option when you can, and treat the first one as a learning step rather than a final answer.
A Simple Weekly Routine to Make It Stick
A planner needs a tiny habit attached to it. Choose one fixed moment each week, such as Sunday evening or Monday morning, to set up the week. Copy deadlines from the month, add fixed commitments, then pick your top three priorities.
Add a short daily check. Two minutes each morning or night is enough: tick what is done, move what is not, and look at tomorrow. Moving a task instead of ignoring it keeps the planner honest.
Once a month, glance back. Notice what you kept moving; those tasks may be too big and need splitting. Notice which sticker meanings you used and which you forgot. Then adjust. Memories can sit in a keepsake too; something like the Cuteness Overload Photo Album, listed in pink, could be a separate home for photos and tickets so your planner stays slim.

Final Checklist Before You Buy
Run through a short list so you do not buy on looks alone. Each point connects to something above, and a quick yes or no on each will point you to the right planner.
If most answers are yes, go ahead. If two or three are no, adjust the layout, size or paper before ordering. You can always pair a plain, well-fitting planner with stickers and pens later, which is easier than trying to make a mismatched one work. Start with function, then let the cute details follow.
Browse the Stationery range with your answers in mind, and take your time. A planner that fits your real week is the one you will actually fill in.
- Does the layout match my average number of daily items?
- Is there enough room for my handwriting in each box?
- Will it fit my bag and my usual writing spot?
- Is the paper suitable for my favourite pen?
- Do I want dated or undated pages?
- Will it lie flat enough for how I write?
- Is there space left for stickers and notes?
- Do I have one weekly moment to set it up?