Created by the Kawaii Vibe editorial team. Our named style desks are editorial personas. Product details and availability can change.
Here's the short answer: on a small table, split your desk into three zones (a daily-reach zone, a storage zone and a look-at zone), then give each zone one container type. Trays hold things you grab often, cups hold tall tools, and pouches hold everything that can live out of sight. Cute comes last, and it works better that way.
Narrow desks fail for a boring reason. Too many small objects each get their own spot, and nothing has a boundary. A pastel pen cup is adorable, but five of them in a row is clutter with a theme. The fix is fewer containers, placed on purpose.
This guide walks through the method step by step, with layouts for different desk depths, ways to compare containers, and a checklist at the end. I'm Emi from The Cute Things Desk, and everything here is planning advice rather than test results. Measure your own table before you buy anything, and treat the layouts as starting points you can bend.
Start With the Zone Method
The zone method means dividing your desk by how often you reach for things, not by what they are. Zone one is the daily-reach area: the space your dominant hand can cover without leaning. Zone two is the storage area: the far corner or edge where supplies wait. Zone three is the look-at area: one spot for something that simply makes you smile.
Why does this beat sorting by category? Because on a small table, a category system tends to spread across the whole surface. Pens in one place, notes in another, stickers in a third. Zones keep everything related to your actual habits close together, and they give each container a job. If an object doesn't fit a zone, it probably belongs in a drawer or on a shelf instead.
To set it up, clear the table completely. Sit down and rest your hands in your normal working position. Whatever your hands naturally land on is zone one. Mark it mentally, or with a bit of removable tape if that helps. Then pick the corner furthest from your elbow for zone two, and the spot at the edge of your eyeline for zone three.
Keep the proportions rough but honest. On most narrow tables, zone one takes about half the surface, zone two a third, and zone three whatever is left. Those aren't measured rules, just a sensible starting split you can adjust after a week of real use.

Measure Before You Shop for Anything Cute
Most small-desk mistakes happen at the checkout page. A tray looks lovely in a photo, then arrives and eats half your depth. Before you buy, take three measurements: the depth of the table front to back, the width of the usable part (excluding where your laptop or keyboard sits), and the height between the surface and any shelf or monitor above.
Write those numbers on your phone. When you shop, compare them with the listed size of each item. If a product page doesn't state dimensions, don't guess. Either skip it or check with the shop first. For example, the Cute Toothpaste Pencil Case is listed at 29 x 10 cm in vegan leather, which tells you it's a long, slim shape that could lie flat along the back edge of a narrow desk.
A handy trick is to cut paper to the size of a container and put it on the table for a day. It costs nothing and shows you straight away whether your elbow hits it or your mouse path gets blocked. Paper templates are especially useful for trays, because a tray's footprint is the thing that most often turns out larger than expected.
Also leave a clear margin. Keep the edge nearest you completely free for at least the width of your forearms. That strip is where your wrists, notebook and tea or coffee live, and no storage idea is worth losing it.

Layout A: The Very Narrow Desk
Say your table is shallow, the kind that fits a laptop and not much else. The rule here is to build upward and along the back edge, not across the middle. Put one slim tray or one long pouch against the back edge, and keep the front two thirds empty for working.
A workable arrangement: a single cup on the far right for tall tools like pens and scissors, a flat pouch lying along the back edge for spare supplies, and a small tray on the left for sticky notes and a paper clip dish. That's three containers for three jobs. Anything extra moves to a drawer, a shelf or a bag.
The long, flat shape of the toothpaste-style case is a natural fit for the back edge, since it can sit like a ruler behind your laptop. Treat it as a stationery holder for pens and small tools, because that's what a pencil case is for, and don't count on it holding anything bulky.
The pitfall on very narrow desks is the temptation to line things up in a row at the front. Resist. A row of cute items along your working edge is the first thing your sleeve will knock over. Keep the front clear and push everything back.

Layout B: The Medium Desk With One Free Side
If your table is a little deeper, or one side is free of a laptop or monitor, you have room for a proper zone one and zone two. Think of the desk as a left and right half. Your dominant-hand side becomes the daily-reach zone, and the opposite side becomes storage.
On the dominant side, place one tray with a low rim. In it go the three or four items you use every day: a pen or two, a highlighter, a small notepad. On the opposite side, put a lidded or zip container for the backups, such as extra refills, spare tape and the stickers you only use for planning. A cup can stand in the back corner for tall items.
This split helps because it separates use from stock. When daily items live in a shallow tray, you can see them all at once, and when they run low, you restock from the storage side. Nothing piles up, because the tray has a physical limit.
For the look-at zone, keep it small. One object near the monitor edge or on a wall shelf is plenty. If you like the idea of a tiny plush companion, the Cute Whale Plush is listed at 15 cm in blue or pink, which is a size that could sit on a corner without taking over. Always check it against your own measured gap first.

Trays: How to Choose and Place Them
Trays are the workhorse of a small desk because they turn loose objects into one movable unit. When you need the surface for something else, you lift the tray and put it aside. That flexibility is worth more than any amount of fancy compartments.
When comparing trays, look at four things: footprint, rim height, whether it has dividers, and what it's made of. A low rim keeps things visible and easy to grab. Tall rims hide small items and make them harder to reach. Dividers help if you have lots of tiny things, but they also lock you into a layout, so skip them if your supplies change often. Only trust the material listed by the seller, and if it isn't listed, don't assume.
For placement, put the tray in zone one, just inside your dominant-hand reach and slightly toward the back. Aim to keep it at an angle that matches how you sit, so you don't twist to reach it. If you have limited depth, choose a long, narrow tray over a square one, because it uses the back edge instead of the middle.
One more tip: use a tray for a mini routine. A tray for evening planning, with a pen, a notepad and a few stickers, can be set out in a minute and put away in another. This is how small desks stay tidy without effort.
Cups and Holders: Going Vertical
Cups are the cheapest way to gain space, since they use height instead of surface. A single cup can hold a dozen items in about the footprint of a mug. The trick is restraint: one cup for tools you use daily, and no more than one or two additional cups for the whole desk.
Sort what goes in. Pens, pencils and a pair of scissors are fine. Rulers and tall markers can lean in the back. But don't stuff a cup so full that you need two hands to pull something out. A good test is whether you can take out one pen without the others following. If not, remove a few.
Weight matters, too. Tall tools in a light cup can tip, particularly if it sits near the edge. Put cups in a back corner, against a wall if possible, and keep the opening angled away from your keyboard so a spill or tumble doesn't hit your gear.
If your desk has a wall or shelf nearby, consider moving the cup off the surface entirely. Browsing home decor for small shelves and hooks is one way to find options that hold a cup, a pouch or a hanging organizer at eye level, which frees the table for working.

Pouches: Hiding the Clutter Cutely
Pouches are your secret weapon for what you don't need to see. Think spare pens, washi tape, stamps, charging cables, hair ties. Each category gets its own pouch, or one pouch if you only have a little. The point is that cute outside plus messy inside is a fair trade on a small desk.
Pick pouches by closure and shape. Zip closures keep contents in place and are good for things you carry. Open-top pouches are easier for quick access but let dust and small objects fall out. Flat, rectangular shapes stack well, and they can slide into a drawer or stand upright on a shelf. Browse the stationery collection to compare cases and pouches by shape and listed size.
The Cute Toothpaste Pencil Case is a good example of how to read a listing. It's described as vegan leather at 29 x 10 cm. That's a long, narrow format, which suits pens, a ruler and a small pair of scissors. If you need to carry a thick stack of markers, you'd want to compare its listed size to your set before ordering.
A rule of thumb is to limit yourself to two pouches on the desk at any time: one for active projects, one for backups. Everything else goes in a drawer or bag. Label them with a small tag or sticker if you tend to forget which is which.
Choosing a Cute Theme Without Making It Messy
Cute is easy to overdo on a small table. The simplest way to keep it under control is to choose a limited palette and a single recurring motif. For example, pink and cream with one animal theme, or blue and white with a small star pattern. When your containers share a few colors, even a crowded desk reads as calm.
Try the two-plus-one approach: two main colors and one accent. Your tray and cup might be pastel pink and cream, with an accent in the pouch. If you add a plush or a decoration, pick a shade that sits within that palette. A mismatch of five colors looks busy, whereas a repeated two or three looks planned.
Scale is part of this, too. Mix one larger statement piece with several quiet ones. A cheerful pouch can be the star while the tray and cup stay simple. Let one thing be loud, and let everything else support it.
If you're still working out your style, the aesthetic room decor collection can help you spot colors and shapes you keep gravitating toward, which makes your desk choices feel more connected to the rest of the room.

Plushies and Decor: Where They Fit
Plush toys are fun on a desk, but they're the first thing to wreck a small layout. The rule is to keep soft items off the working surface unless they're tiny. Large ones belong on a chair, a shelf, a bed or the floor nearby. The desk gets only the small ones.
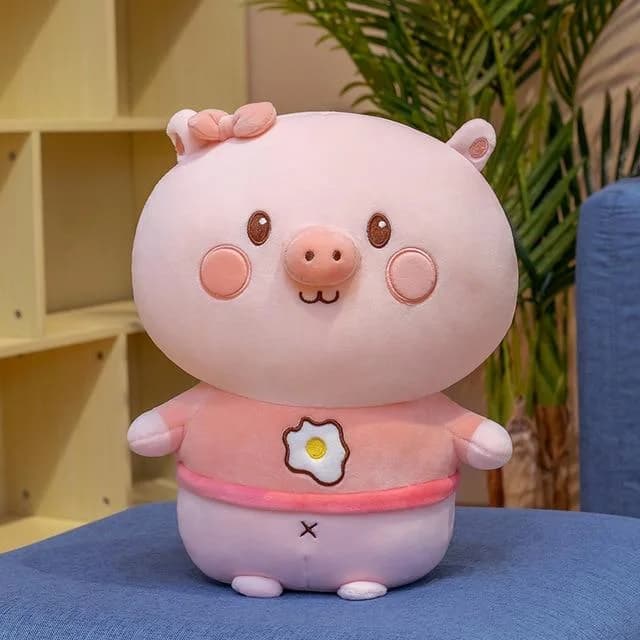
Check the listed sizes carefully. The Cute Whale Plush comes in 15 cm in blue or pink, which is small enough to consider for a monitor edge or shelf. The Cute Piglet Plush is listed at 35 cm, 45 cm, and 65 cm, and the Cute Fox Plush is listed as pictured, so look at the product page for its proportions. These bigger sizes are more likely to suit a chair corner or a nearby shelf than a narrow table.
If you love a large plush, give it a home beside the desk. The Cute Dinosaur Plush is listed from 50 cm up to 120 cm, and the Cute Cow Plush from 50 cm to 70 cm, so they're really room companions. Put one on a chair or a floor cushion and the desk stays clear.
For small touches that stay on the table, browse kawaii decorations and pick one object. A single item in the look-at zone does more than five scattered ones.


Cable, Tech and Hidden Basics
A cute desk can still look messy if the cables are a tangle. Tech is part of the layout, so give it a zone. Charging cables and a power strip belong in the storage zone, ideally under or behind the table. Anything you plug in daily should have a clear path that doesn't cross your writing area.
Use simple tools: a clip on the table edge to hold a cable end, a small pouch for chargers, a tray for your phone and earbuds. If your phone sits on the desk, give it a fixed spot, ideally on the non-dominant side, so it doesn't drift into your work area.
Keep an eye on liquids and electronics. Keep drinks on the opposite side from your laptop, and place cups of pens away from the keyboard so they don't spill into it. This is common sense rather than a specific rule, but on a narrow table, one accident can reach everything.
If your wall is free, mount hooks or a small board above the desk for headphones, a bag or a tote. Adding vertical hooks is a gentle way to keep the surface clear without buying more containers. Look through the home decor range for small wall-friendly pieces, and check each product's listed details before assuming it fits.
A Weekly Reset Routine That Takes Ten Minutes
A good layout isn't enough on its own. A small desk stays tidy only if there's a quick reset. Choose one day a week and run a short routine. It doesn't need to be exciting, it just needs to be easy enough that you'll actually do it.
Start by emptying the tray into your hand. Throw out dried pens, scraps and wrappers. Put back only what you've used this week. Then check the cup: if you haven't touched a pen in a month, move it to a pouch or give it away. Finally, wipe the surface and return everything to its zone.
It helps to set a hard limit for each container. For example, the tray holds five items, the cup holds eight, and the pouch holds what fits when closed. Limits turn tidying into a simple count rather than a debate.
A tiny bonus: refresh your look-at zone. Swap the object, rotate a small decoration, or change a card. This keeps the desk feeling new without buying anything, and it makes the reset feel like a small treat instead of a chore.
Common Pitfalls and How to Fix Them
The first pitfall is buying matching sets just because they match. A set often includes pieces you don't need, and each extra piece takes space. Choose containers one at a time based on your zones, and pick up a matching extra only if it fills a real gap.
The second is ignoring depth. Items that look small in photos can be bulky on a table. Always compare listed sizes with your measurements, and when a size isn't given, avoid guessing. The same applies to materials and features: use only what the seller states.
The third is storing by looks instead of use. A gorgeous pouch at the back of the drawer does nothing for you. Put the things you use most in the easiest spots, even if their containers are plain. Cute can be everywhere else.
The fourth is cluttering the working edge. If something is on your front strip, it should be there because you're using it right now. When you finish, it goes back to its zone. If you notice things accumulating there, that's a sign a container is too small or too far away.
Last, don't expect perfection. A desk that works 90 percent of the time is a success. A few stray items are normal, and that's what the weekly reset is for.

Your Small-Desk Checklist and Shopping Order
Here's the order I'd follow, from planning to buying. Start with the free steps, since they stop you from buying the wrong thing. Then buy in order of impact: the container that solves your biggest daily annoyance first, and the decor last.
Before you spend, run through the list below. If you can tick each point, you're ready to buy or rearrange with confidence. Revisit it whenever the desk starts to feel crowded again, because that usually means one of the steps slipped.
Finally, remember that cute desk organization is personal. Some people want a bare surface with one lovely pouch, others want a small shelf of treasures. Both can work as long as the zones hold. Start small, adjust after a week, and add pieces slowly, using the stationery and kawaii decorations collections as a place to browse when you know what gap you're filling.
- Measure desk depth, usable width and shelf height
- Clear the table and find your three zones
- Cut paper templates for trays and pouches
- Keep the front forearm strip empty
- Limit yourself to one tray, one or two cups, two pouches
- Pick two main colors and one accent
- Keep large plushies off the surface
- Give cables and your phone a fixed spot
- Set item limits for each container
- Do a ten-minute reset once a week