
Created by the Kawaii Vibe editorial team. Our named style desks are editorial personas. Product details and availability can change.
Kawaii drawing looks effortless, but it follows a few simple habits: round shapes, small features set low on the face, and plenty of empty space. Once you see those habits, you can build almost anything cute from circles, ovals and gentle curves.
This guide gives you ten small projects: a smiling cloud, sleepy star, cat face, frog face, bear mug, strawberry, cactus in a pot, wrapped candy, tiny mushroom and round penguin. Each one has numbered steps, a note on where to place it on the page, color ideas and one variation to try next. They are sized for a sketchbook corner, a sticky note or the margin of a planner.
You do not need training. You need a pencil, a pen and a willingness to draw each one a few times.
Setup: What You Need Before You Start
Keep the kit small. A sharpened pencil and a good eraser let you build shapes lightly before committing. A fine-tip black pen gives clean outlines, and a few markers or colored pencils cover the color. Smooth paper helps pens glide, while slightly toothy paper is kinder to colored pencil. Stationery you already own is plenty, and if you want a fresh notebook or pen set, the Stationery collection is one place to look.
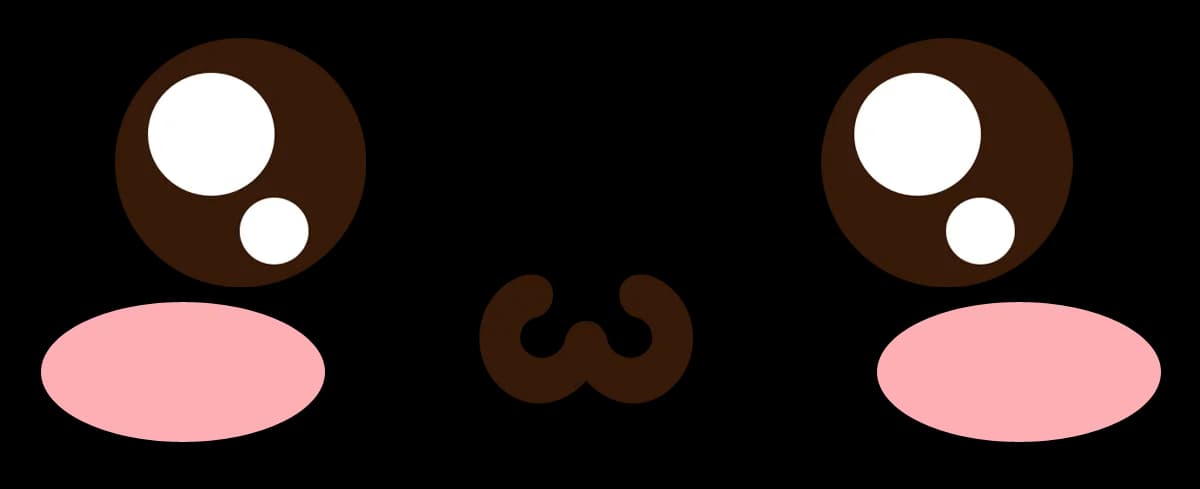
Before any project, learn the kawaii face formula. Eyes are small dots or short arcs placed low and wide apart. The mouth is tiny, often a little curve or a small "w", and sits close to the eyes. Cheeks are soft ovals of pink under the eyes. Placing features low in a round shape is what makes a drawing read as young and sweet.
Draw lightly first, ink second, erase third. Wait for the ink to dry before erasing so you do not smear it.
- Pencil and eraser for guide shapes
- Fine black pen, around 0.3 to 0.5 mm
- Markers or colored pencils in pastel and mid tones
- A white gel pen for highlights, if you have one
- Scrap paper for warm-up shapes
1. Smiling Cloud
The cloud teaches you to merge bumps into one soft outline. It is the easiest project here, so it makes a good warm-up.
Composition: Draw it wider than it is tall and leave empty space above. Place it near the top of a page so other doodles can sit beneath it like weather.
Color: Pale blue outline fill, a white cloud with a light blue shadow along the bottom, or a soft lavender for a dusk feel.
Variation: Make it a rain cloud by adding three short teardrops below and giving it a tiny closed-eye smile.
- Draw a flat-bottomed oval, lightly, about the size of a coin.
- Add three overlapping half circles along the top: a large one in the middle and smaller ones at the sides.
- Trace the outer outline only, skipping any lines inside the cloud.
- Place two small dot eyes in the lower middle, with a wide gap between them.
- Draw a tiny curved smile between the eyes, slightly lower.
- Add oval cheeks on the outside of each eye.
- Color lightly and add a pale shadow along the bottom edge.
2. Sleepy Star
A five-point star becomes friendly when its corners are rounded and its face is relaxed. The trick is to draw the star first with straight lines, then soften it.
Composition: Tilt the star slightly, about ten degrees, so it looks like it is drifting. Add a few small dots or tiny crosses around it as sparkles.
Color: Butter yellow with a peach cheek, or a lilac star on a navy page.
Variation: Add a small nightcap shape by drawing a curved triangle on one point, with a tiny circle at its tip.
- Lightly draw a small circle in the center as a guide.
- Mark five points around it, one at the top, and connect them in a star.
- Round each tip by drawing a small curve over each sharp point.
- Round the inner corners slightly too, so the whole shape looks puffy.
- Draw two downward arcs for closed eyes, like tiny smiles turned upside down.
- Add a small open oval mouth for a yawn, or a short line for calm sleep.
- Draw pink cheeks, then erase the guide and color.

3. Cat Face
The cat face is a wide oval with two triangle ears. Because it is wider than tall, it feels squishy and cute.
Composition: Center it on the page and keep the whiskers short. If you add a body later, make it a small bean shape below.
Color: Cream, orange, gray or black are all easy. For a black cat, color the head fully and use a white gel pen for eyes and a pink nose.
Variation: Draw a tabby by adding three short stripe lines on the forehead and a lighter muzzle patch.
- Draw a wide oval, about one and a half times wider than tall.
- Add a triangle ear on each upper corner, overlapping the oval.
- Erase the oval lines that run inside the ears.
- Place two dot eyes low and wide apart.
- Draw a tiny triangle nose between and just below the eyes.
- Add a small "w" mouth under the nose.
- Draw two or three short whiskers on each side, keeping them outside the cheeks.
- Add inner ear shapes and pink cheeks, then color.
4. Frog Face
A frog is a wide, low head with eyes that bulge on top. Those bumps are what make it read as a frog rather than a green blob.
Composition: Put the frog near the bottom of the page, as if sitting at the edge of a pond. A few curved lines beneath it can suggest water.
Color: Fresh green with a lighter belly tone, or a mint frog with coral cheeks for a softer look.
Variation: Add a lily pad by drawing a flat oval under the frog with a small wedge cut out of it.
- Draw a wide, flat oval for the head.
- On the top left and right, add two circles that overlap the head.
- Erase the head line inside each circle so the eyes pop out.
- Draw a small dot pupil in each eye, placed toward the center.
- Draw a wide, gentle smile across the lower head.
- Add two tiny dots for nostrils between the eyes.
- Add round pink cheeks under the eyes.
- Color the head green and leave the eyes lighter.

5. Bear Mug
This one combines a simple cylinder with a bear face. Drawing the mug first gives you a stable base and teaches basic object construction.
Composition: Show the mug straight on, with the handle on the right. Add two curved steam lines above it to fill the space.
Color: Warm brown bear face on a cream mug, or a pastel pink mug with a white bear.
Variation: Turn it into a bear-ear lid by drawing two half circles on top of the rim, as if ears peek over the edge.
- Draw a rectangle with slightly rounded bottom corners for the mug body.
- Add a C-shaped handle on the right side, drawing it as a thick loop.
- Draw a flat oval across the top for the rim opening.
- Add two small half circles on top, at the left and right of the rim, as ears.
- Draw two dot eyes on the front, low and wide apart.
- Draw a small oval muzzle between them, with a tiny nose on top.
- Add a small curved mouth under the nose.
- Add two steam curls above the mug and color.
6. Strawberry
A strawberry is a rounded triangle with a leafy top. The seeds are what make it recognizable, so space them evenly.
Composition: Tilt it a little and place it off-center, leaving room for a second smaller berry or a few leaves.
Color: Bright red or coral, with green leaves and pale yellow seeds. A pink strawberry gives a candy-like look.
Variation: Draw a sliced strawberry, showing a pale center and a heart-shaped cut face.
- Draw a rounded triangle with the point facing down.
- Add a wavy line across the top for the base of the leaves.
- Draw four or five pointed leaf shapes sitting on that line.
- Add a short stem curving up from the middle.
- Place two dot eyes in the upper middle of the berry.
- Add a small smile and cheeks beneath the eyes.
- Scatter small teardrop seeds across the body, avoiding the face.
- Color the berry, then the leaves, and leave the seeds light.

7. Smiling Cactus in a Pot
The cactus is built from tall rounded rectangles, and the pot gives it a solid base. Make the arms short, because long arms can look awkward.
Composition: Place the pot at the bottom center and let the cactus rise from it. Keep a bit of space on each side so the arms do not feel crowded.
Color: Soft sage green with darker green stripes, and a terracotta, white or pastel pot.
Variation: Add a tiny pink flower on top by drawing five small petals around a dot.
- Draw a tall rounded rectangle for the main body.
- Add a small arm on the left, a short curved tube that bends upward.
- Add a second arm on the right, set slightly higher.
- Draw the pot below as a trapezoid, wider at the top, with a thin rim band.
- Place two dot eyes on the main body, low and wide.
- Add a small smile and cheeks.
- Draw a few short vertical lines along the body for ridges.
- Add tiny cross marks as spines and color.
8. Wrapped Candy
This candy is a circle with two twisted ends. It is a good project for practicing symmetry, because both sides should match.
Composition: Draw it horizontally, slightly tilted. Small dots or stars around it make the page feel playful.
Color: Pink with white stripes, or mint with a yellow wrapper. Use a lighter shade for the twisted ends.
Variation: Draw a swirl lollipop by replacing the wrapper ends with a thin stick below the circle.
- Draw a medium circle in the center.
- On the left, draw a small triangle pointing toward the circle.
- Repeat on the right, making it the same size.
- Add a small fan of three short lines at each outer edge for the wrapper fringe.
- Draw two dot eyes and a small smile on the circle.
- Add two light curved lines inside the circle for a shine.
- Add stripes or dots to the wrapper ends.
- Color the circle and ends in contrasting tones.
9. Tiny Mushroom
A mushroom is a dome sitting on a short stem. The cap should be much larger than the stem so it looks small and sweet.
Composition: Draw several in different sizes, grouped at the bottom of the page, to make a little patch. Overlapping the stems adds depth.
Color: A red cap with white spots and a cream stem is classic. A lavender cap with pale pink spots is a gentler option.
Variation: Add a small snail beside it using a spiral shell and a curved body.
- Draw a half circle for the cap, with a flat bottom edge.
- Make the bottom edge slightly curved, like a gentle smile.
- Draw a short, thick stem beneath, wider at the base.
- Add a small curved line at the base for the ground.
- Place two dot eyes on the stem, close to the cap.
- Add a tiny smile between them.
- Draw three or four round spots on the cap in different sizes.
- Color the cap, leave the stem light and add a soft shadow.
10. Round Penguin
The penguin is almost an egg shape, with a lighter belly oval inside. Keeping the arms and feet tiny is what makes it adorable.
Composition: Stand it in the center with a small oval of ground beneath its feet. A few dots can suggest snow.
Color: Navy or charcoal for the body, white for the belly, and orange for the beak and feet.
Variation: Give it a small scarf by drawing a curved band under the head with a short tail hanging down.
- Draw a large egg shape, with the wider end at the bottom.
- Inside it, draw a smaller oval for the belly.
- Add two small dot eyes high on the belly, wide apart.
- Draw a small triangle beak between them, slightly lower.
- Add a pair of small rounded wings on the sides, angled down.
- Draw two small oval feet at the bottom.
- Add pink cheeks beside the eyes.
- Color the outer body dark, leave the belly white, and color the beak and feet.
Practice Advice: Making the Drawings Your Own
Repeat each drawing three times on one page. The first will feel stiff, the second smoother, and the third will start to show your own style. Compare them and note which curves you like best.
Change one thing at a time. Move the eyes lower, enlarge the cheeks or shrink the mouth, and see how the expression changes. Small adjustments teach you more than starting over.
Try a limited palette. Pick three colors and use only those on a page. It makes a set of drawings look consistent, which helps when you want to turn them into stickers, planner decorations or card art.
Finally, keep a page of failed attempts. Wobbly circles and uneven eyes are normal, and the page shows how much you improve. Short, regular sessions of ten minutes work better than one long attempt.