Created by the Kawaii Vibe editorial team. Our named style desks are editorial personas. Product details and availability can change.
A kawaii cat is mostly a handful of friendly shapes: a wide round head, two small ears, tiny dot eyes, a bean-shaped body and a curl of tail. The charm comes from how those shapes relate to each other, not from detail. That makes it a good first drawing project, and a good warm-up for experienced doodlers too.
This guide teaches one original cat, sitting and facing you. We will build it in ten stages, from light construction lines to color. After that you will find expression variations, ideas for practice, and a troubleshooting list for the problems that most often make a cat look off.
All measurements here are suggestions. Cute drawing is forgiving, so treat the numbers as a starting point and adjust by eye. You need only paper, a pencil, an eraser and a dark pen or fineliner. Colored pencils, markers or a tablet are optional.
What You Need and How to Set Up
Use a pencil you can erase easily, such as an HB or a mechanical pencil, and press lightly. The first stages are guesses, and light lines vanish cleanly. For the final outline, a fineliner or a fine brush pen gives a crisp, even line. Smooth paper helps ink glide, and a sketchbook, notepad or loose sheet all work.
Draw big. A cat about the size of your palm leaves room to place small features accurately. Tiny drawings make the eyes and mouth hard to control. If you have a grid or dotted notebook, use it to keep the cat centered and level.
Before you begin, picture the finished layout: the head takes up roughly half of the cat's total height, and the body sits underneath, slightly narrower than the head at the top and a little wider at the bottom. That big-head, small-body ratio is the core of the kawaii look.
Step 1: Draw the Head Circle
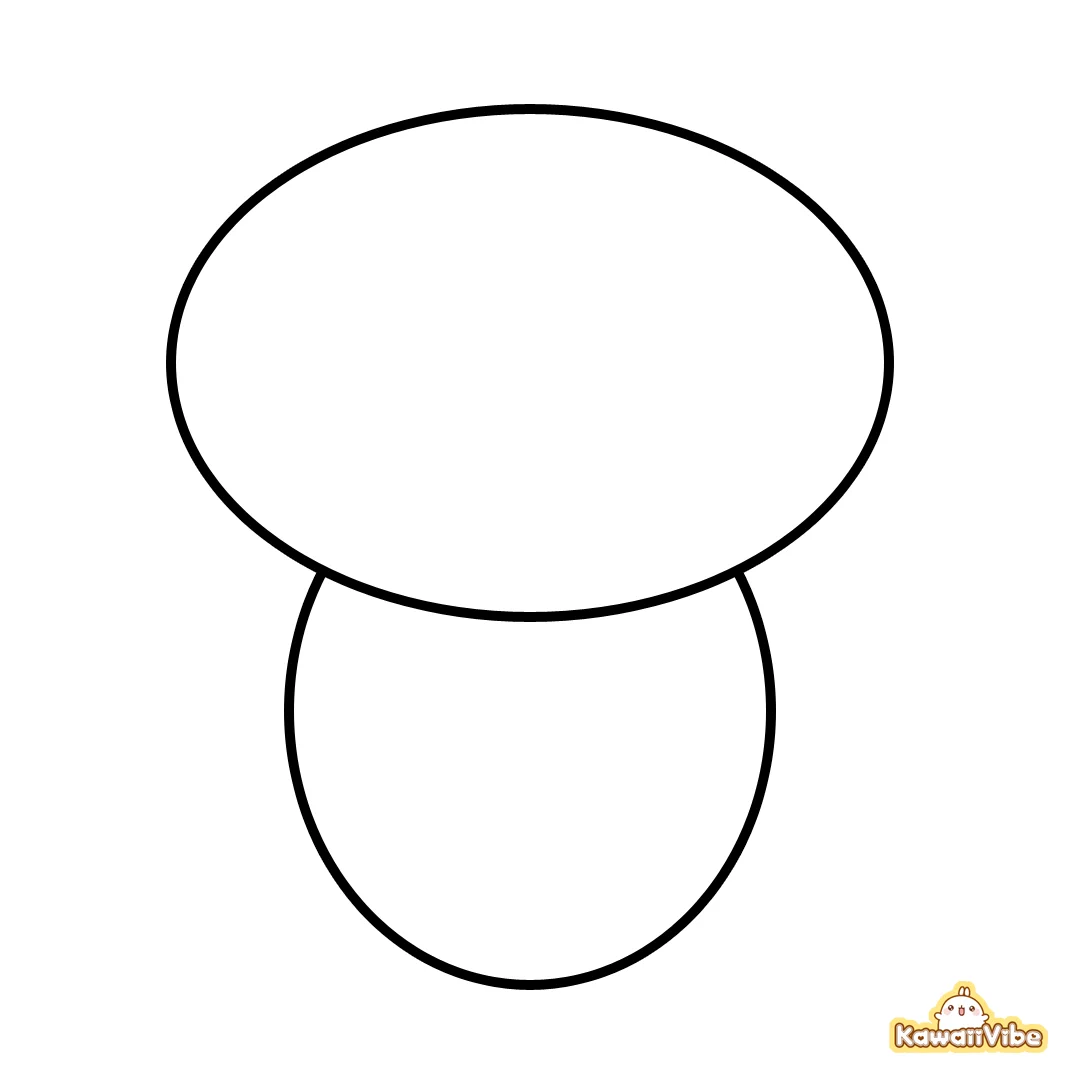
Start with a wide, slightly squashed circle in the upper middle of the page. Think of a round dumpling or a mochi rather than a perfect ball. A width about 1.2 times the height reads as soft and chubby. Draw it lightly, in one or two loose strokes.
Leave space below for the body. A good rule is to keep about as much empty paper beneath the head as the head is tall, so the body and tail fit without cramping.
Step 2: Add Face Guidelines
Lightly draw a vertical line down the center of the head. This keeps the face symmetrical. Then draw a horizontal curve across the head, slightly below the middle. The curve should bow downward a little, as if the head is a ball seen from a tiny bit above.
The eyes will sit on this horizontal line, and the nose and mouth will sit just beneath it. Placing features low on the head is one of the most reliable ways to make a character look younger and cuter. If the line is too high, the face looks more like an adult cat.
Step 3: Place the Ears
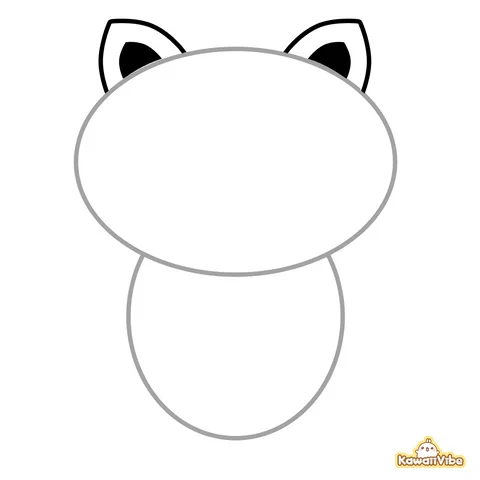
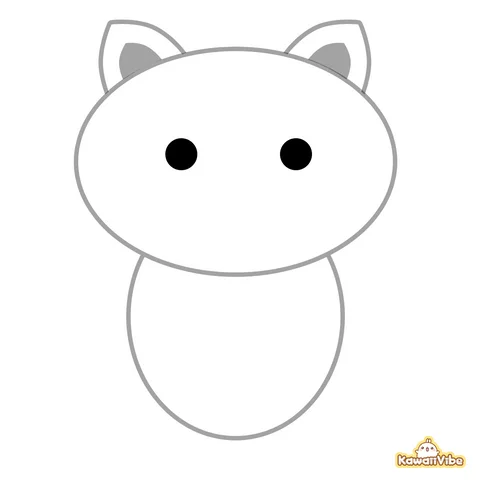
Draw two small triangles on top of the head, one on each side of the center line. Let the base of each triangle sit inside the circle, so the ears seem to grow from the head instead of being stuck on. Keep them modest: about one quarter to one third of the head's width at the base.
Tilt each ear outward slightly, and round the tips a little. Sharp points can look fierce, while softened tips feel gentle. Make both ears about the same size, but do not worry about perfect mirroring. A tiny difference gives life.
Step 4: Sketch the Bean-Shaped Body
Under the head, draw a bean or egg shape with the narrower end tucked beneath the chin. The body should be a little shorter than the head is tall, and its widest point near the bottom suggests a seated cat with a round belly and settled hips.
Let the head overlap the top of the body. Overlap is important, because it removes the neck and creates that compact, squishy silhouetteThe overall shape an outfit creates, from fitted to loose and layered.. The bottom of the bean can be gently flattened so the cat seems to rest on a surface.
Step 5: Add Front Paws and the Curled Tail
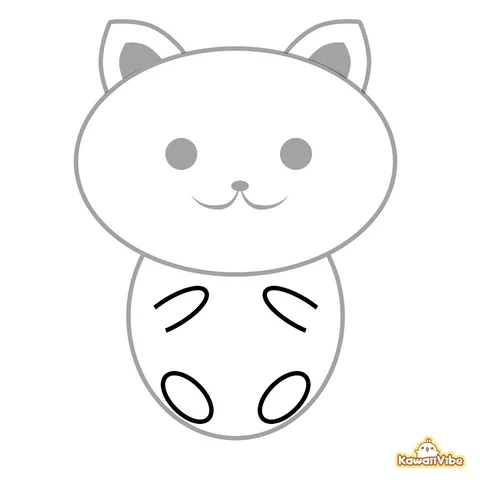
Draw two small ovals or rounded rectangles at the bottom front of the body, side by side with a small gap between them. Each paw should be about one fifth of the body's width. Keep them short and stubby. You can add two tiny curved lines on each paw for toes, or leave them plain.
For the tail, begin at the lower side of the body, on whichever side you like, and draw a soft curve that sweeps outward and curls upward, ending in a rounded tip. Keep it thick enough to look plush, roughly the width of a paw at the base. A simple C or S curve works well. The tail adds balance, so place it on the side that feels emptier.
Step 6: Draw the Eyes, Nose and Mouth
Now the face. Draw two solid dots on the horizontal guideline, each about the same distance from the center line. A good suggestion is to space them about one eye-width-and-a-half away from the center, so they are wide-set. Wide-set eyes read as sweet and innocent. Make each dot small; large eyes can work, but tiny dots give the quiet, minimal style this guide uses.
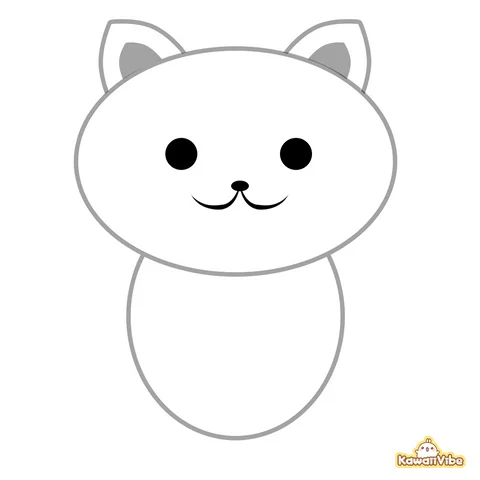
For the mouth, draw a small curve from the nose down a short way, then split it into a gentle sideways W or a cat-like 'ω' shape. Keep it small. The mouth should be narrower than the space between the eyes. A tiny smile does more than a large one.
Place a very small nose, such as a tiny rounded triangle or oval, on the center line just below and between the eyes. Keep it close to the eye line. A big gap between eyes and nose makes the face long.
Step 7: Refine the Shapes
Before inking, look at the whole sketch and make adjustments. Redraw the head outline with a slightly fuller cheek: pull the sides out a little below the eyes so the face looks puffy. Smooth the line where ears meet the head. Check that the body is not wider than the head at its broadest point, unless you want a very round, chubby cat.
Add small details if you like: a few short whisker lines on each cheek, two tiny inner-ear curves, and a little fluff mark at the end of the tail. Keep any detail sparse. Every extra line competes with the simple face.
Step 8: Ink and Clean Up the Lines
Trace over your best lines with a fineliner. Use smooth, confident strokes and lift the pen at corners instead of wobbling around them. Draw the head first, then ears, body, paws and tail. Leave out any construction lines and the places where the head overlaps the body, since those overlapped parts should not show.
Let the ink dry for a minute or two, then erase the pencil gently. If you smudge, switch to a clean eraser and work in one direction. A slightly varied line, thicker on the bottom of shapes and thinner on top, adds a hint of weight without changing the style.
If you drew digitally, put your sketch on a low-opacity layer and ink on a new layer. Use a round brush with a little stabilization.
Step 9: Add Simple Shading
Kawaii shading is light and flat. Pick one imaginary light source, for example the upper left, and put soft shadow on the opposite side. Good spots are the underside of the head where it overlaps the body, the lower right of the body, the inner side of the tail curl, and the gap between the paws.
With pencils, use gentle hatching or a light tone. With markers, use a slightly darker shade of the base color. In digital work, a multiply layer at low opacity does the same job. Add two small oval blush marks under the eyes as an optional highlight in pink. Keep shadows to a few clean shapes, not blended gradients, so the cat stays graphic and soft.
A small white dot in each eye, if you leave space for it, makes the eyes look shiny. Add it before coloring, or use a white gel pen afterward.
Step 10: Color the Cat
Choose a palette of three or four colors. A calm option is a cream or soft gray body, a pink inner ear and cheeks, and a slightly darker tone for shadow. For a patched cat, add one or two spots on the head and tail, using shapes with rounded edges.
Color the largest area first, then add accents. Stay inside the lines, but remember that tiny gaps between color and outline can look charming in this style. Pastel and low-saturation colors suit the mood, but strong colors such as orange or black also work; just keep the face features dark enough to read.
If your lines are not waterproof, color with pencils first, or test the ink on scrap paper before using markers.
Facial Expression Variations
Once the base cat feels easy, change only the face and keep the body the same. Small shifts create a very different mood.
- Happy: replace the dot eyes with upward arches, like small upside-down U shapes, and add a slightly bigger smile.
- Sleepy: draw eyes as short downward curves and make the mouth a small flat line or tiny curve. Add a few 'z' marks nearby.
- Surprised: make the eyes slightly larger and rounder, and draw the mouth as a small open oval.
- Grumpy: angle two short eyebrow lines downward toward the center and flatten the mouth.
- Shy: add extra blush marks and move the eyes slightly lower, with a tiny wobbly mouth.
- Hungry: keep dot eyes, add a small tongue poking out of the mouth, and tilt the head by rotating the whole head circle a few degrees.
Practice Variations
Repeating the same cat with small changes builds control faster than starting a new subject each time. Try these exercises, ideally one per sitting.
- Draw a row of five cats with different head widths, from tall to very wide, and decide which one you find sweetest.
- Change the tail: straight up, wrapped around the paws, or a small question-mark curl.
- Try a loaf version by removing the paws and making the body a smooth rounded rectangle.
- Add one small prop, such as a tiny fish, a ball of yarn or a cup, placed near the paws.
- Draw the cat in a one-color pen only, then redraw it with three colors to see how color changes the mood.
- Make a sticker sheet or notebook page of six expressions, which is a nice use for a plain notebook or sticky notes.
Troubleshooting Common Problems
Most problems come from a few proportions. Compare your drawing with these fixes.
- The cat looks like a different animal: the ears may be too large or too far apart. Make them smaller and bring them closer to the top center of the head.
- The face looks long or serious: lower the eyes, bring the nose closer to them, and widen the head.
- The eyes look uneven: draw a light horizontal line through both before inking, and measure the distance from each to the center line.
- The body looks stiff: round the corners, overlap the head more, and add a gentle belly curve.
- The paws look pasted on: tuck them slightly under the body outline and keep them short.
- The tail looks detached: start it behind the body so the body outline overlaps its base.
- The mouth looks scary: make it smaller and use soft curves instead of angled lines.
- The ink line looks shaky: draw slower strokes from the shoulder rather than the wrist, or redraw in short, connected segments.
- Colors look muddy: use fewer colors, let layers dry, and keep shadows to one slightly darker tone.
Keep Your Cat Consistent
If you want to draw the same cat again and again, write down your own proportions. Note the head width, the distance between eyes, the ear size and the tail shape on a small reference card, or keep a sketch of the finished cat nearby. Consistent features turn a simple doodle into a recognizable character of your own.
Use your favorite stationery for the results: a dedicated sketchbook for practice, a pen set for clean lines, and a few pastel markers for color. Keep what feels good in your hand, and do not worry about owning more. The best kawaii cat is the one you enjoy drawing again tomorrow.